Introduction
Christmas is a season of joy, warmth, and togetherness.
For parents, grandparents, and guardians, it’s also the perfect opportunity to show children just how much they are loved.
While store-bought gifts are convenient, nothing quite compares to a homemade present.
DIY gifts for kids not only spark creativity but also carry a heartfelt touch that money simply can’t buy.
In this blog post, we’ll explore 7 DIY Christmas gifts for kids that are fun to make, affordable, and sure to light up little faces on Christmas morning.
1. Personalized Storybook
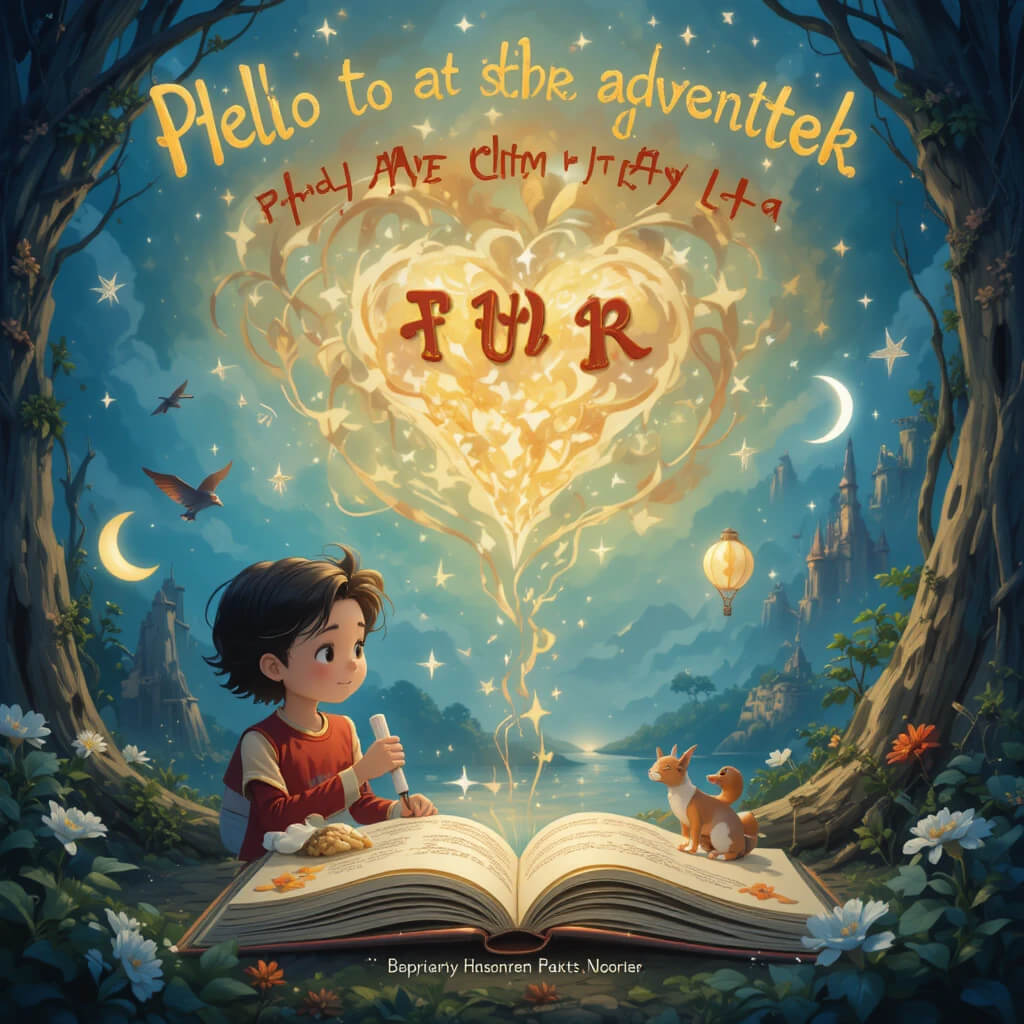
Why It’s Special
Kids adore stories, and nothing makes a bedtime tale more magical than being the star of the adventure.
A personalized storybook gives your child a chance to be the hero of the narrative while also encouraging a love for reading.
How to Make It
- Materials Needed: Blank notebook or sketchbook, markers, colored pencils, stickers, scrapbook paper, glue, scissors, and photos of your child (optional).
- Steps:
- Draft a simple story where your child is the main character. It can be about them traveling to the North Pole, meeting Santa, or going on a magical quest with talking animals.
- Illustrate each page yourself or use printed clipart to decorate the story.
- Add photos of your child’s face onto characters for a humorous and personalized twist.
- Bind it with ribbon or leave it as a decorated notebook.
Tips for Success
Keep the story age-appropriate and interactive. For younger kids, add flaps to lift or textures to feel.
For older ones, you can write a longer narrative.
Word Count So Far: ~450
2. Homemade Playdough Kit
Why It’s Special
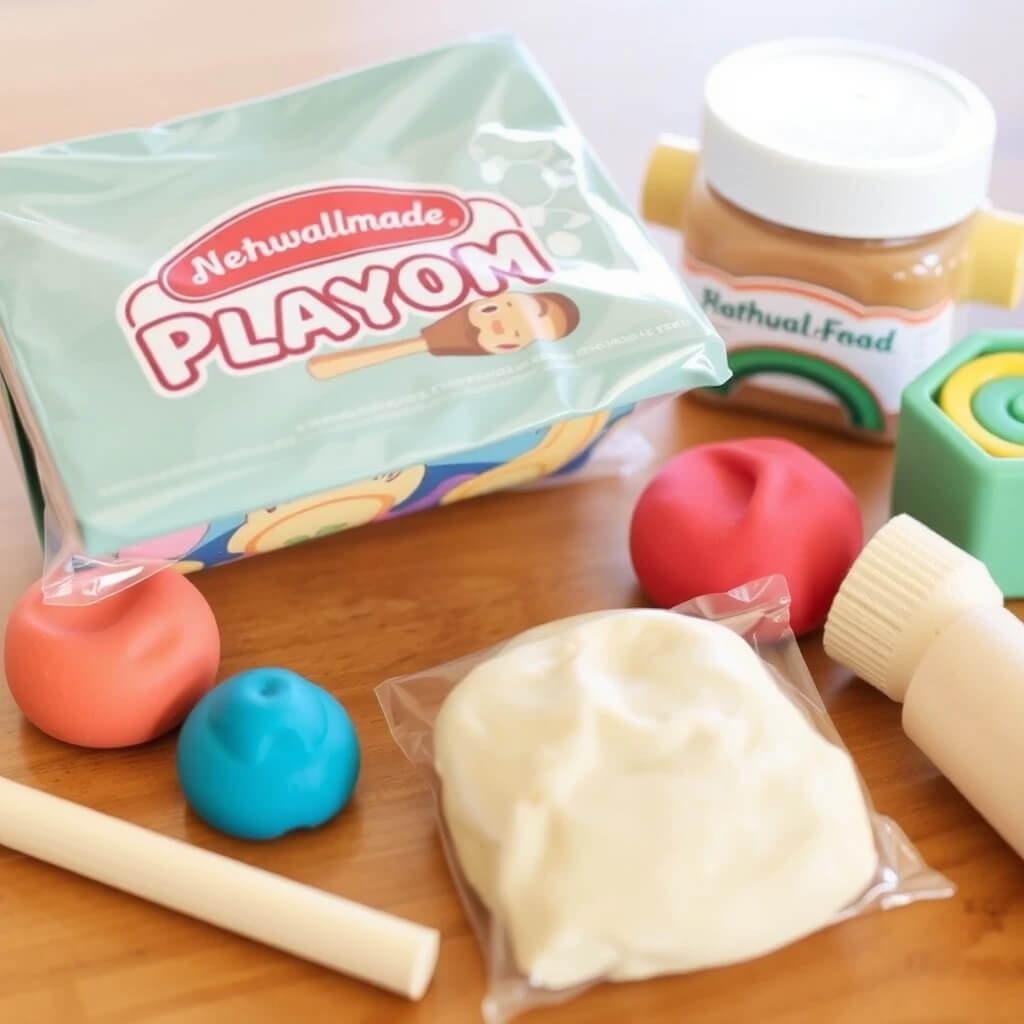
Playdough is a timeless favorite for kids, and making your own allows you to customize colors, scents, and packaging.
Plus, it’s safe, non-toxic, and much cheaper than store-bought versions.
How to Make It
- Ingredients: 2 cups flour, 1 cup salt, 2 tablespoons cream of tartar, 2 cups water, 2 tablespoons vegetable oil, food coloring, and optional essential oils (like lavender or peppermint).
- Steps:
- Mix the dry ingredients in a pot.
- Add water, oil, and food coloring, stirring over medium heat until it thickens.
- Knead until smooth.
- Store in airtight containers or jars.
Packaging Ideas
Decorate mason jars with festive ribbons and labels. Include cookie cutters or small rolling pins for extra fun.
Tips for Success
Make multiple colors and scents to keep kids engaged. Label each jar with the “flavor” like “Candy Cane Red” or “Snowflake Blue.”
3. No-Sew Sock Plushies
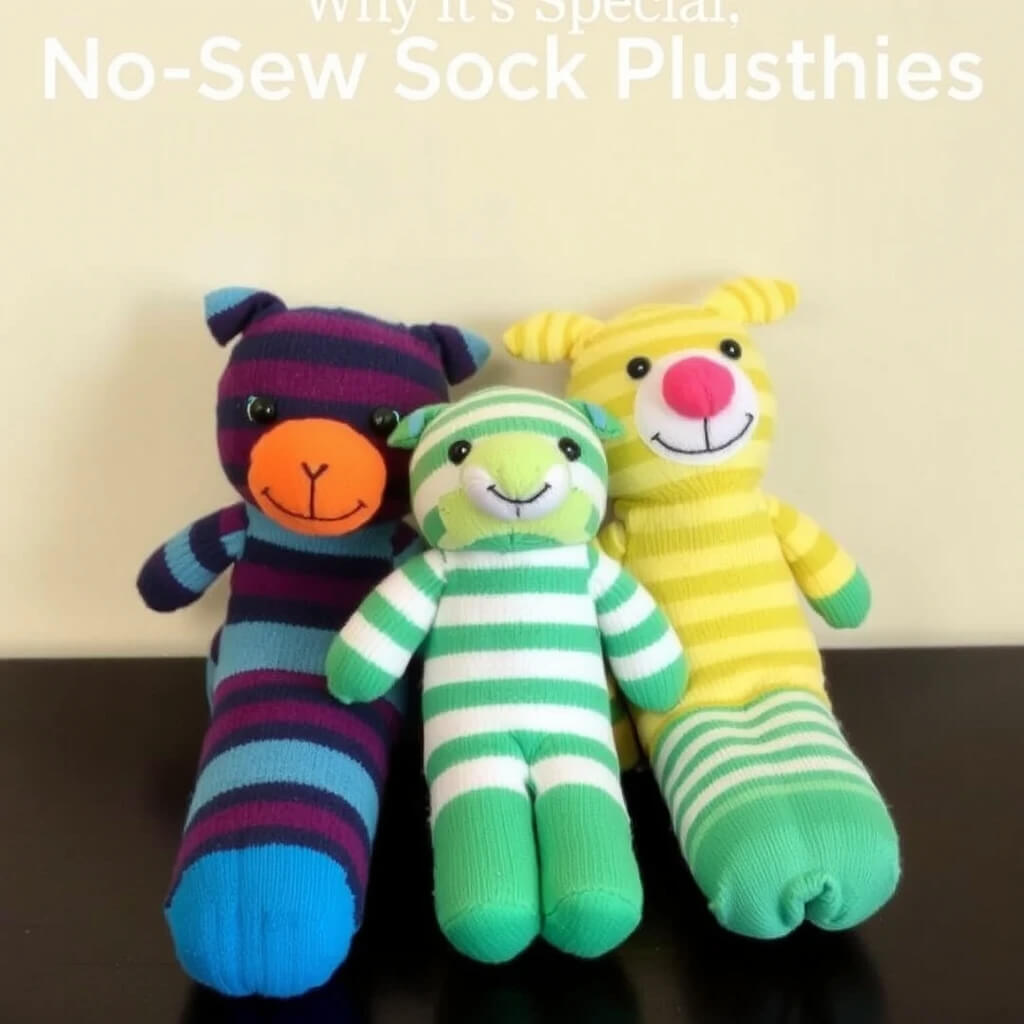
Why It’s Special
Children love stuffed animals, and making one out of socks is both simple and charming.
These plushies can be customized to resemble a child’s favorite animal or even become their own imaginary creature.
How to Make It
- Materials Needed: A pair of colorful socks, stuffing (cotton or fiberfill), rubber bands, fabric glue, felt pieces, googly eyes, and ribbon.
- Steps:
- Fill a sock with stuffing.
- Use rubber bands to shape the body and head.
- Add ears, arms, or tails using felt cutouts.
- Glue on googly eyes and draw a mouth with fabric marker.
- Finish with a ribbon bow around the neck.
Packaging Ideas
Place the plushie in a small gift bag with a personalized note like “Made just for you.”
Tips for Success
Encourage kids to help in decorating their plushie for a fun holiday craft activity.
4. DIY Puzzle from Family Photos
Why It’s Special
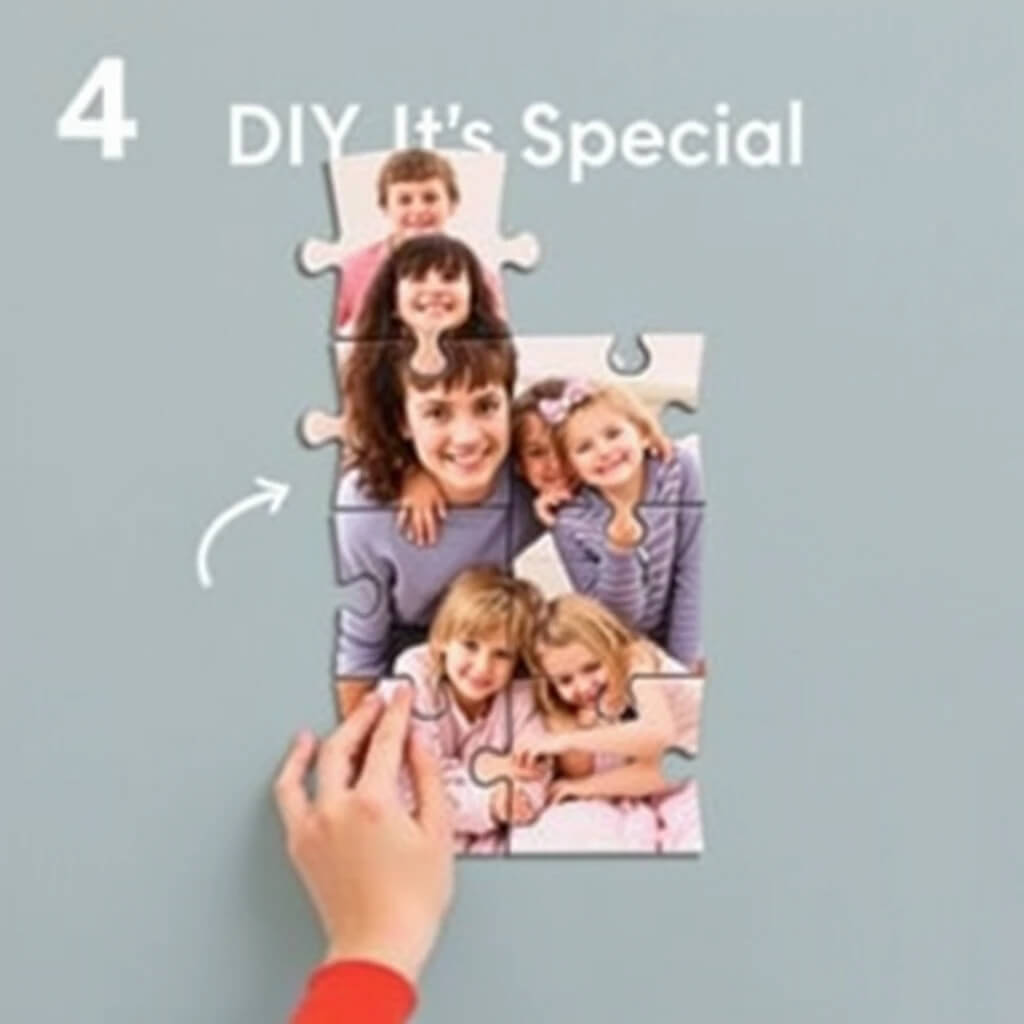
A personalized puzzle not only entertains but also helps with problem-solving skills. It’s also a meaningful keepsake featuring family memories.
How to Make It
- Materials Needed: A printed photo, cardboard, scissors or craft knife, glue, and clear varnish.
- Steps:
- Print a family photo or a festive holiday picture.
- Glue it onto sturdy cardboard.
- Once dry, cut the cardboard into puzzle-like shapes.
- Place the pieces in a decorated box or bag.
Packaging Ideas
Use a tin box with the picture glued on top so kids know what the completed puzzle looks like.
Tips for Success
For younger kids, cut fewer, larger pieces. For older kids, make more intricate cuts for a challenge.
5. Handmade Crayon Shapes
Why It’s Special
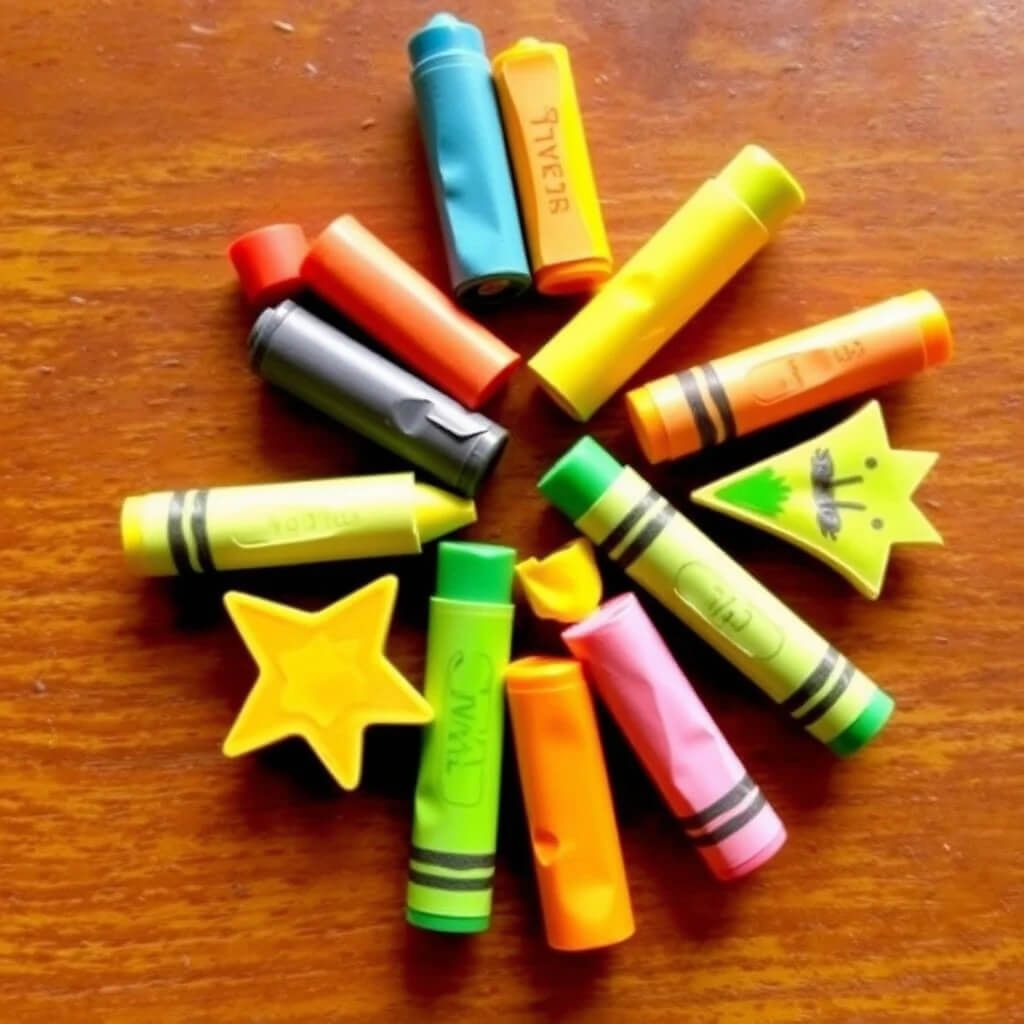
Broken crayons are inevitable in households with kids.
Instead of tossing them, recycle the pieces into fun shapes like stars, Christmas trees, or animals.
These unique crayons make coloring even more exciting.
How to Make It
- Materials Needed: Old crayons, silicone molds (holiday shapes work best), and an oven.
- Steps:
- Peel paper off crayons and break them into small pieces.
- Place them in silicone molds.
- Bake at 250°F (120°C) for about 15 minutes until melted.
- Let them cool and pop out the new crayons.
Packaging Ideas
Wrap sets of crayons in clear treat bags tied with festive ribbons. Pair with a small coloring book for a complete gift.
Tips for Success
Mix different colors in one mold to create swirled “rainbow” crayons.
6. Memory Jar of Kind Words
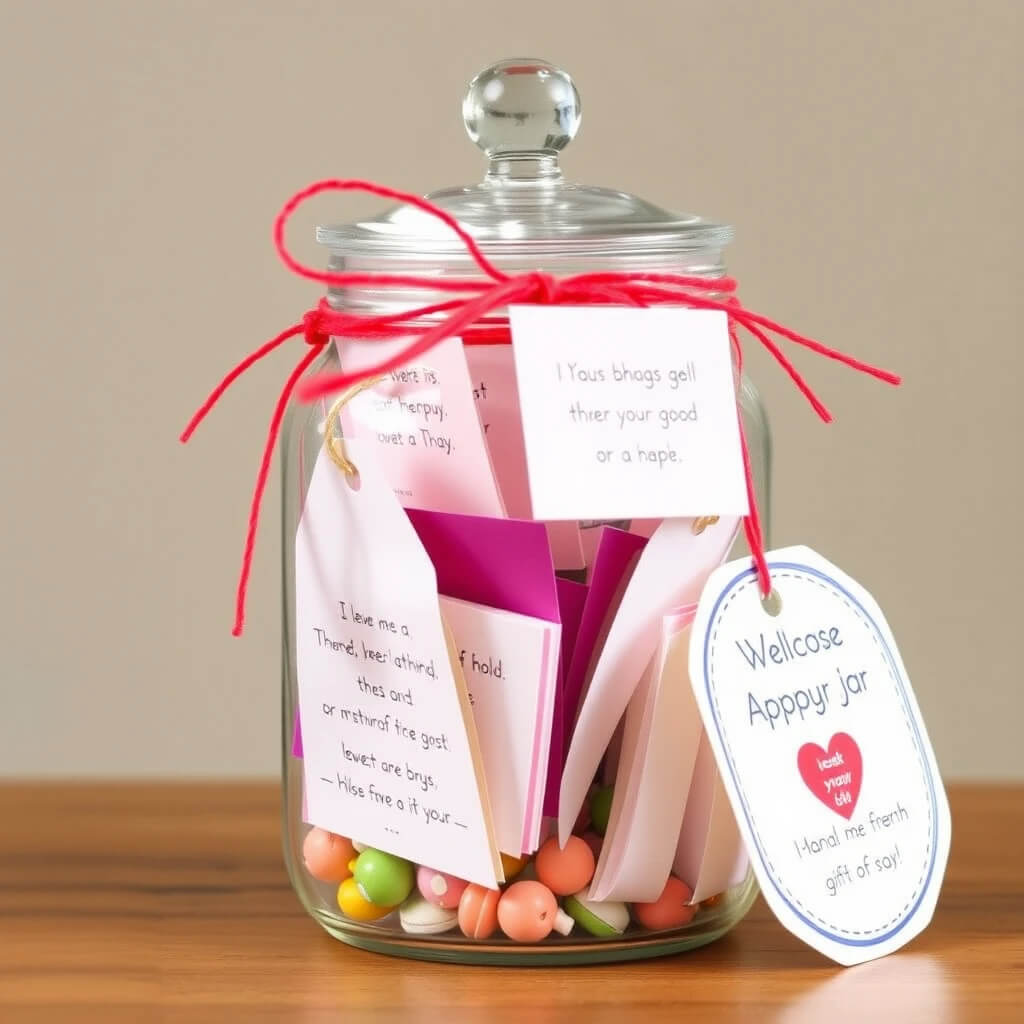
Why It’s Special
Sometimes, the best gifts aren’t toys but words of love and encouragement.
A “Memory Jar” filled with affirmations, jokes, and kind notes is a gift that children can open throughout the year whenever they need a smile.
How to Make It
- Materials Needed: A mason jar, paper slips, markers, stickers, and ribbons.
- Steps:
- Write 30–50 notes such as “You are loved,” “Remember the time we baked cookies together,” or “You’re brave and kind.”
- Fold each slip and place it in the jar.
- Decorate the jar with festive stickers, glitter, and ribbon.
Packaging Ideas
Label the jar: “Open one note whenever you need a smile.”
Tips for Success
Encourage siblings or family members to contribute notes for a truly collective gift.
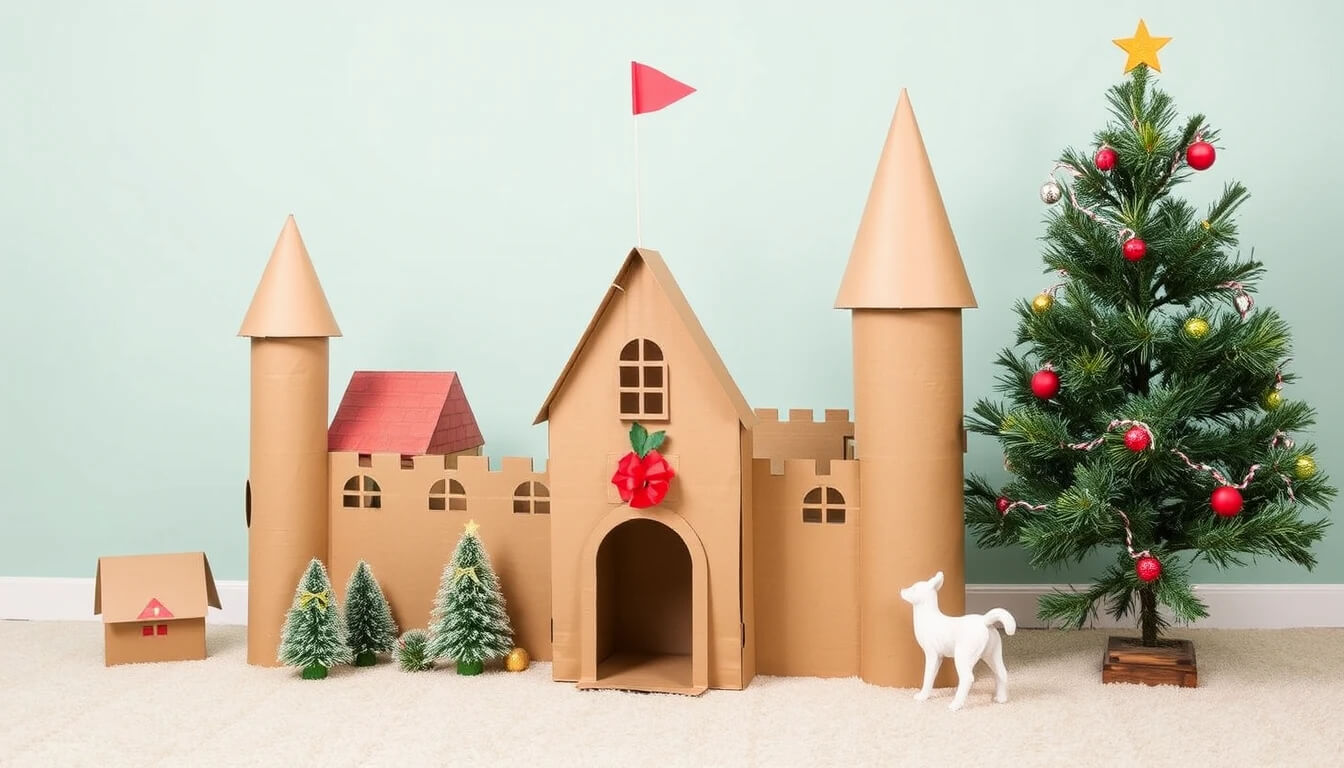
7. Cardboard Playhouse or Castle

Why It’s Special
Large gifts don’t need to be expensive.
With a little creativity, you can turn cardboard boxes into an incredible playhouse, castle, or spaceship.
This gift fosters imagination and endless hours of play.
How to Make It
- Materials Needed: Large cardboard boxes, scissors, tape, paint, markers, and decorations like stickers or wrapping paper.
- Steps:
- Collect large boxes (appliance boxes work best).
- Cut windows and doors into the cardboard.
- Paint and decorate the outside with festive designs or castle bricks.
- Add details like flags, curtains, or fairy lights (battery-powered).
Packaging Ideas
Wrap the finished playhouse in a giant bow or simply reveal it on Christmas morning as a surprise.
Tips for Success
Make the design flexible—kids might want a castle today but a spaceship tomorrow. Keep it versatile for different games.
conclusion
A DIY Christmas gift for kids isn’t just a present—it’s a memory in the making. Creative, affordable, and fun, these handmade ideas add a personal touch that store-bought items often lack.
By putting in a little time and love, you create gifts that spark joy, encourage imagination, and show kids the true spirit of Christmas: thoughtfulness, care, and togetherness.